Google Search Console, a critical tool in your SEO arsenal, can be tricky to set up. However, since it’s the only valid source of Google keyword referral data, making data-based decisions in your SEO program requires that you choose one of nine methods to enable its use.
In order to confirm that you own a site, Google Search Console requires verification to show that you have either financial or technical ownership of the domain you’re trying to gain information about. Verification prevents competitors from accessing data for your site that could give them an unfair SEO advantage.
Before you get started, sign up for Google Search Console. Google will prompt you to sign in to your Google account (or create one).
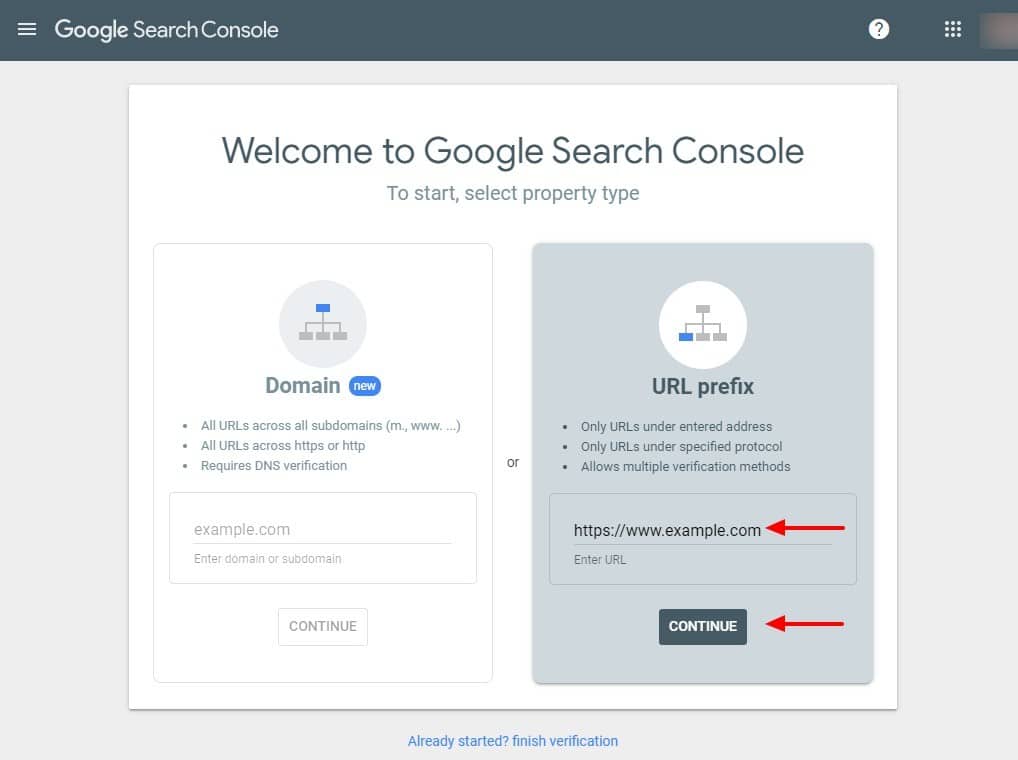
Next, Search Console will ask you to type in the domain you want to verify. The example above shows a request to verify the site at https://www.example.com. Type in your site’s protocol (such as https), subdomain (such as www) and domain (such as example.com), and click “Continue.”
It’s important to note that you will only be verified for that precise subdomain and domain combination. If your primary site is hosted at https://example.com, requesting verification for https://www.example.com will not give you access to the data for your primary site.
After choosing a domain to verify, you need to prove your site ownership through one of these nine methods. Only one needs to be successfully completed for verification purposes.
Get Access through a Verified User
- Add User: If you know someone who is a verified user, the easiest way to gain access to Google Search Console is to ask them to add you as a user.
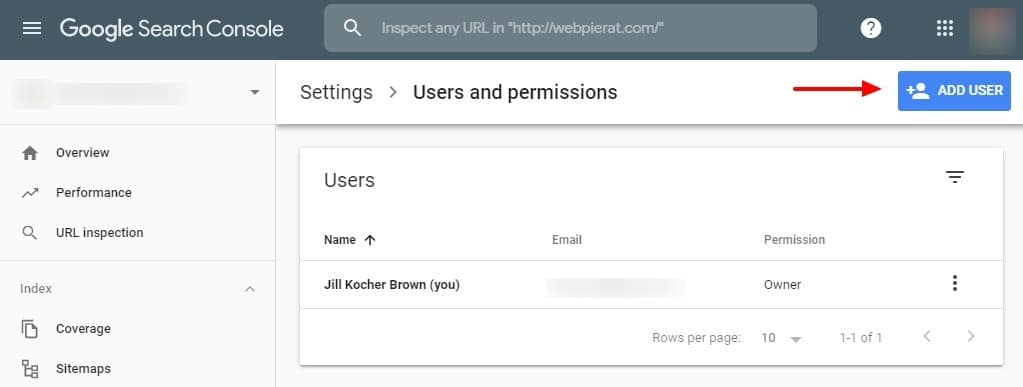
Giving a new user permission to access Google Search Console. The current user logs in to Google Search Console, selects “Settings,” then “Users and permissions,” and clicks the blue “Add User” button, as shown above.
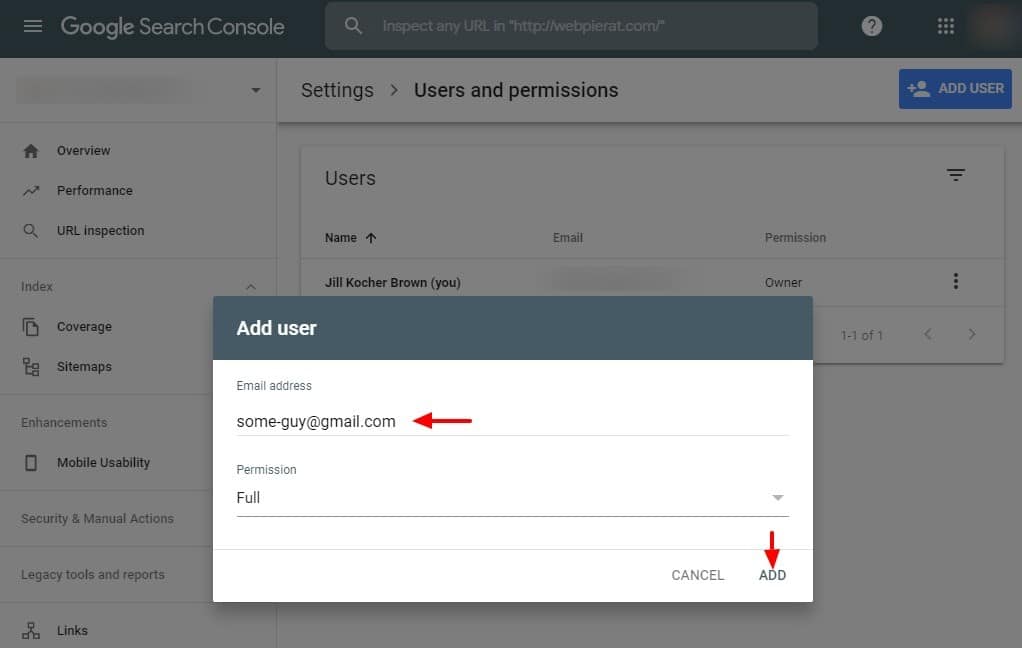
Identifying whom to give Google Search Console access to. Next, the current user enters the Gmail address that needs access to the Google Search Console account, determines whether to grant “Full” or “Restricted” access, and clicks “Add.”
Your developer may already be verified, or the person who owns your SEO program. If you can’t find someone with access, you’ll need to use one of the methods below to prove ownership.
The Usual Choices for Google Search Console Verification
If you have access to your web server, or work closely with someone who does, these three methods are the most common ways to verify a site.
- HTML file upload: With the HTML file verification method, Google creates a small text file that you place at the root of the site. Its only purpose is to prove that you have access to the site’s server. When Google verifies that the file has been uploaded, it grants you access to Search Console.
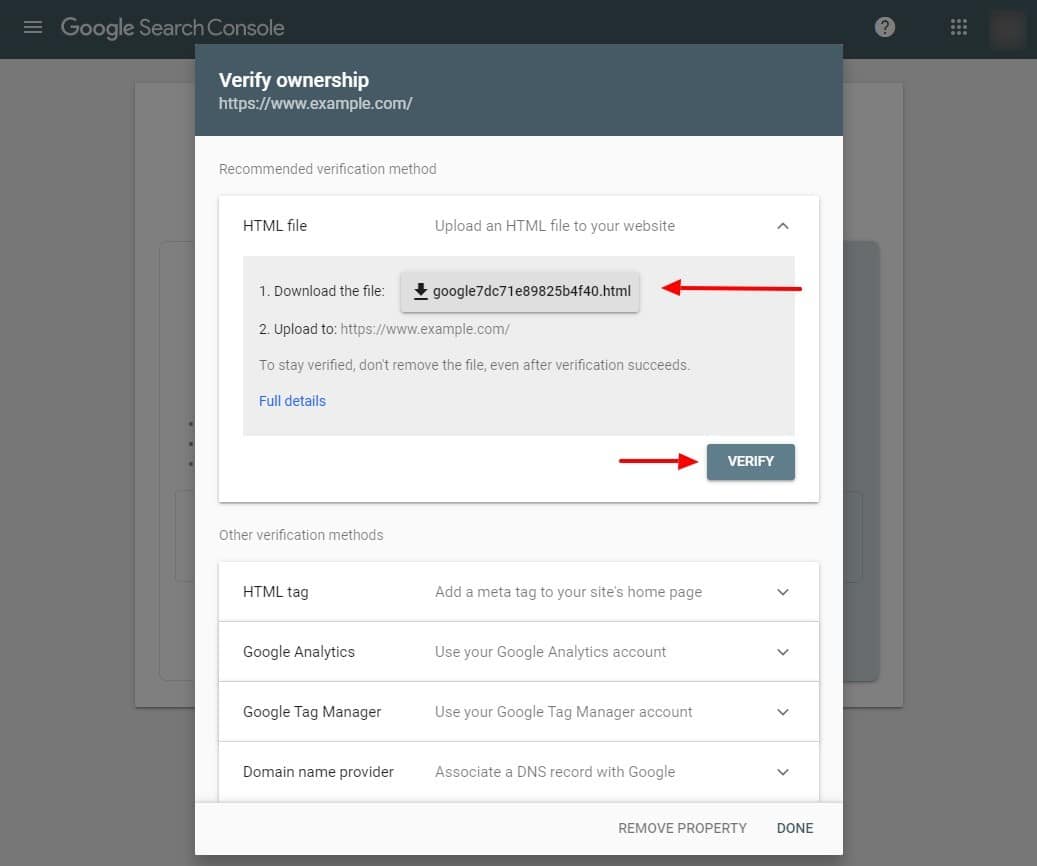
Using the HTML file verification method. Simply click the download button in Google’s first step, shown above, and post (or ask your developer to post) the downloaded file to the root of the site. After the file has been uploaded, click the gray “Verify” button. If you click the button before the file has been posted, you’ll be sent back to this screen.
- HTML tag: Similar to the HTML file method, the HTML tag method involves inserting a Google meta tag on your homepage to prove you have access to the site’s server.
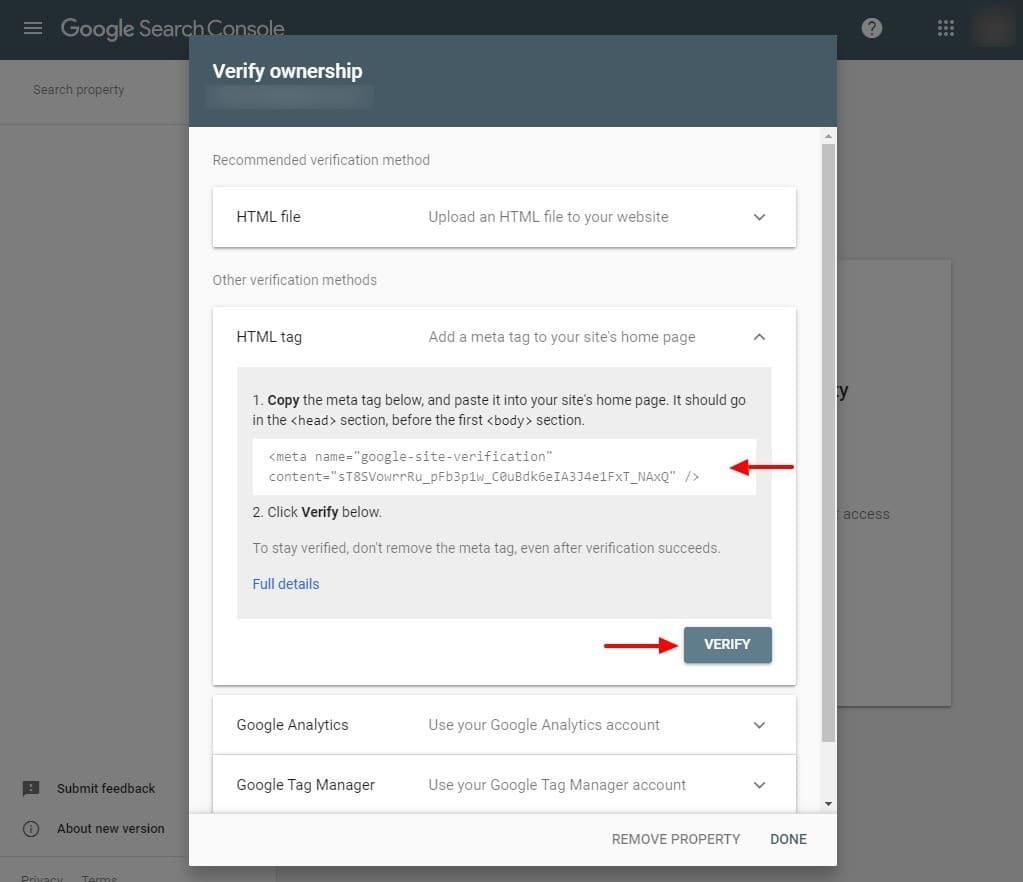
Using the HTML tag verification method. Copy the meta tag indicated in Google’s first step as shown above, and paste it into the head of your homepage’s HTML code, near the title tag and meta description. When the meta tag is in place, click the gray “Verify” button.
- DNS record: The DNS, or domain name server, converts the numerical IP address for your web site into the letter-based domains that people recognize as web site addresses. For this verification method, a developer inserts a new DNS record at the domain name provider. For example, they would log into GoDaddy or Coudflare to complete this step.
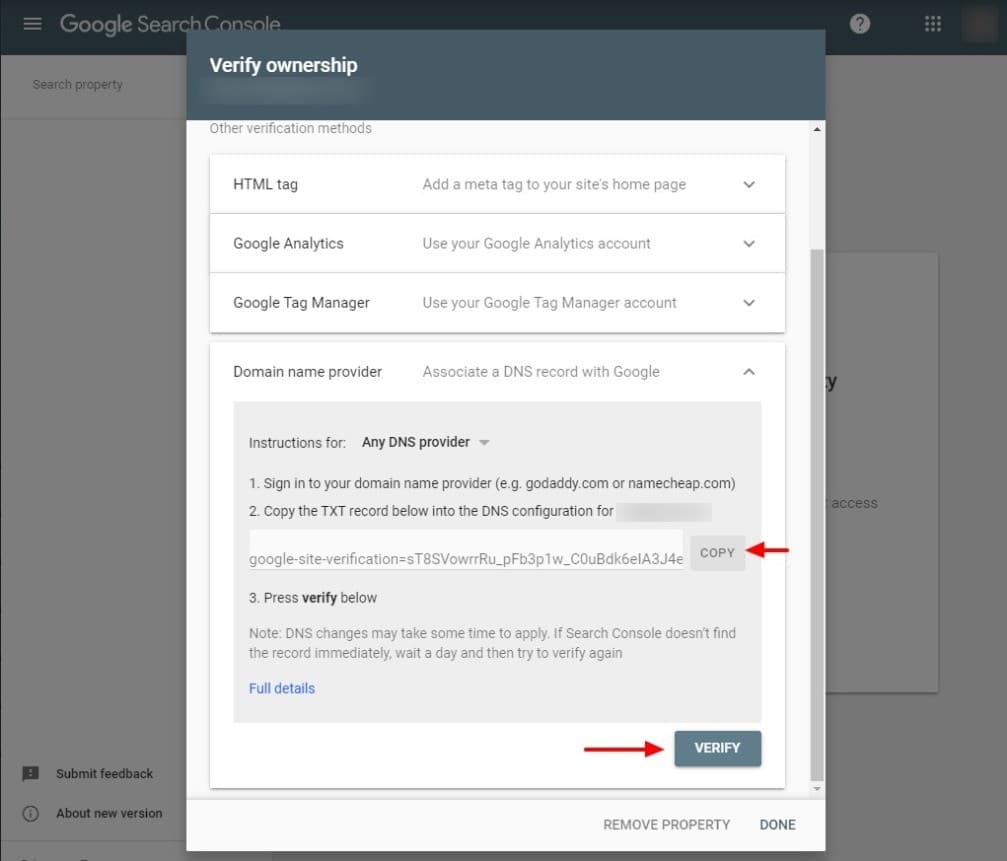
Using the DNS record verification method. After your developer logs into the domain name provider, they create a new Google Search Console DNS record by pasting the text that they copied by clicking the “Copy” button, shown above. When complete, click the “Verify” button in Google Search Console. It may take a day or so for the DNS record to apply at your domain name provider, so come back to click the “Verify” button again, if it isn’t successful the first time.
Verification through Other Google Products
Google provides a wide array of products, and offers the ability to verify site ownership through some of them. However, each of these methods comes with additional conditions that make using them more difficult than using the basic HTML file, HTML tag, and DNS record methods.
The other Google products you can use to verify your Google Search Console account include:
- Google Analytics: If your tracking code uses either the analytics.js or gtag.js snippet, verifying Google Search Console through Google Analytics may be an option. You’ll also need to have “edit” access in Google Analytics, and the tracking code must be in the head section of your Homepage’s HTML source code.
- Google Tag Manager: Using your container snippet, you can use Google Tag Manager to verify Google Search Console ownership. In order to use this verification method, your Google Tag Manager account must have “manage” access, however, and the tag manager code needs to be placed immediately following the body tag in your HTML source code.
- Google Sites: While Google Sites is listed as a verification method, the documentation actually refers users to the Google Analytics or HTML tag verification methods instead.
- Blogger: Google accounts that create new blogs through Blogger are automatically verified in Google Search Console.
- Google Domains: Registering your domain through Google Domains automatically verifies your Google account for Google Search Console.
While verification requires some technical gymnastics, the data that Google Search Console offers is worth the hassle. There is no substitute on any other platform for its keyword-related analytics. As you’re determining which of these nine methods to use, check Google Search Console’s help documentation for the fine print on each.


